3D Modeling Project 1

17/04/20- 17/05/20 (Week 1- Week 9)
Riyaz Mohamed Zain ( 0334031)
3D Modeling
Project 1
Riyaz Mohamed Zain ( 0334031)
3D Modeling
Project 1
LECTURE NOTES
Lecture 3
15/05/20 (Week 5)
Today Mr. Kannan taught us how to add textures to objects using hypershade in Maya. using textures we can add values and details to the model. We learned about the different functions of each option within the hypershade menu as well as the different lamberts available within.
Lecture 4
22/05/20 (Week 6)
We learned about the importance of UV mapping when modeling 3d objects. Uv mas allows us to define areas of the model so that textures can be applied better without warping and stretching.
Lecture 5
29/05/20 (Week 7)
Today we learned how to texture objects using substance painter. mt Knnan explained the interface and how to apply materials to separate sections of the model. He told us that we need to be smart when choosing how colors and textures and each decision will present a different mood and effect on the model.
INSTRUCTIONS
PROJECT 1
Week 4
8 May 2020
Project 1 is to create a hard surface model. After brainstorming ideas I decided to do a mechanical model of fish. I started to look for similar models and scam across models of bi mechanical creatures.
 |
| Fig 1.1 Brainstorm. |
Using this for inspiration I started to sketch out some design for my model.
 |
| Fig 1.2 Sketch of the model |
 |
| Fig 1.3 Colorin the sketch to get a better idea |
Week 5
15 May 2020
After getting approval from Mr. Kannan I started to work on blocking out my model in Maya.
 |
| Fig 2.1 Blockout side |


After I fished the initial block out I moved onto adding more details to the model. I used separate objects to add the different mechanical sections of the fish.
 |
| Fig 2.3 Adding details |

Week 6
22 May 2020
After looking at the initial design Mr. Kannan suggested that I make some changed to the tail to make it look more like fish. Taking his advice I decided to change the design before moving on to the next part.
 |
| Fig 3.1 Updating sketch with different tail design |
After sketching out the new design I took it into Maya and started to remake the design of the tail.
 |
| Fig 3.2 Redesigned tail |

After redesigning the tail I moved onto cleaning up the meshes and making the UV to exported into substance painter.
 |
| Fig 3.5 Preparing the UV map |
Here is the Final design before texturing
 |
| Fig 3.6 Final Model |

 |
| Fig 3.6 Final Model |
Week 7
22 May 2020
 |
| Fig 4.1 1st texture draft |
Mr. Kannan told me the textures were too simple and I should try a different approach. I was also not completely content with the initial design so moved back into a substance painter. I was now a little more familiar with how texturing worked in substance so worked add more details into the design.
 |
| Fig 4.2 Tetuxing process in Substance Painter. |
 | |
|
After I finished texturing in substance painter I imported it to Maya for rendering but I came across a problem. My colors were not being reflected in the Maya file accurately so I decided to render directly from substance painter.
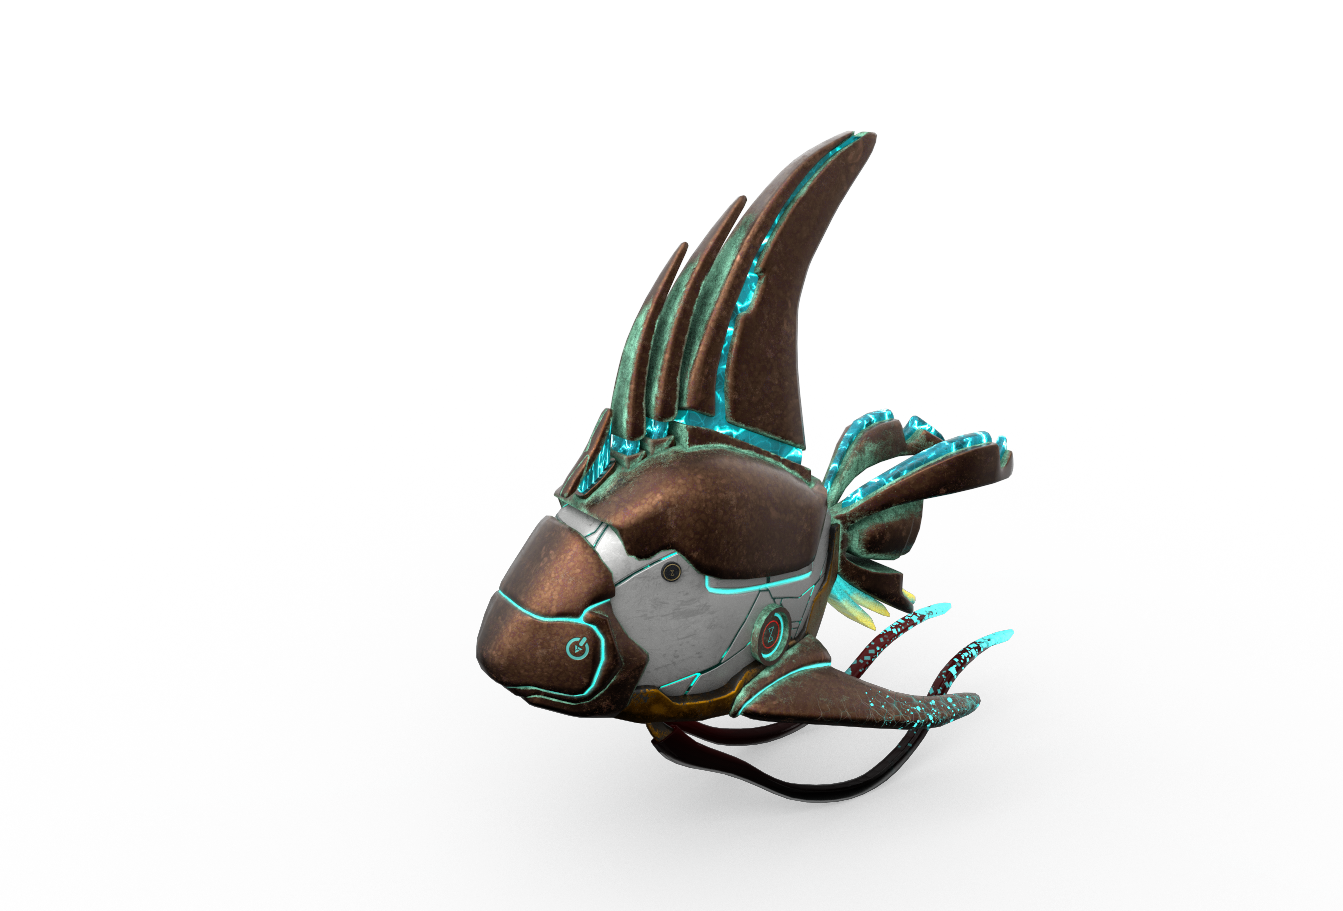 |
| Fig 4.4 Final Render |

 |
| Fig 4.6 Final Render |

 |
| Fig 4.8 Closeup Final Render |

 | |
|


Comments
Post a Comment