07/05/19- 23/05/19 (Week 6- Week 7)
Riyaz Mohamed Zain ( 0334031)
Digital Photography
Project 1
INSTRUCTIONS
Project 1
Week 6 - Week 7
Our task for our Project 1 was to come up with surrealistic composition.The criteria was that at least one component of the image should be an original photograph. To start we were asked to sketch out some ideas that we had so that it could be assessed and approved.
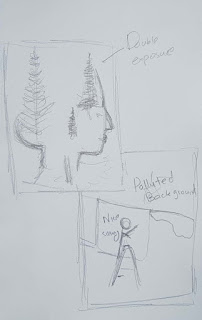 |
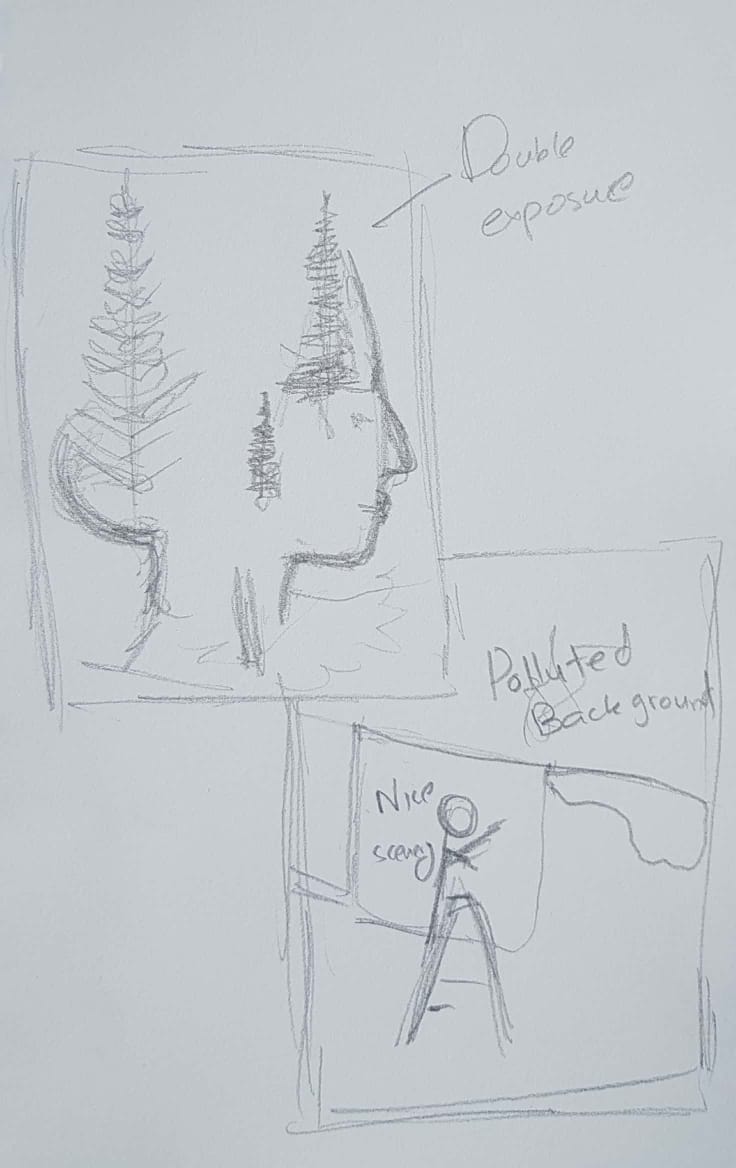
| Fig 1.1 Sketch |
My initial sketch had two concepts. One was a a forest background layered onto a face (Double Exposure). The idea for this was to show the connection between humans and nature. My second concept was a picture of a man hanging clothes the, behind the cloth we can see heavy pollution and on top of the cloth the same scenery continues but is now green and lush. This image is to show how we are covering up the reality of the word and acting like everything is okay when it really is not.
After showing the sketches Mr Jeffrey an Mr Martin told me that the double exposure image was something they would like to see done. He mentioned that only one other student had attemted this technique and it might be challenging.
I felt that the idea behind the Double exposure was stronger so I opted to do this concept.
 |
| Fig 1.2 Original Photograph |
I started of with a photograph of my subject for the Artwork. I tried to capture a very subtle expression in Photograph.
 |
| Fig 1.3 Edited Photograph |
I took my image into Lightroom to edit the brightness, Contrast and Sharpness of the image.
 |
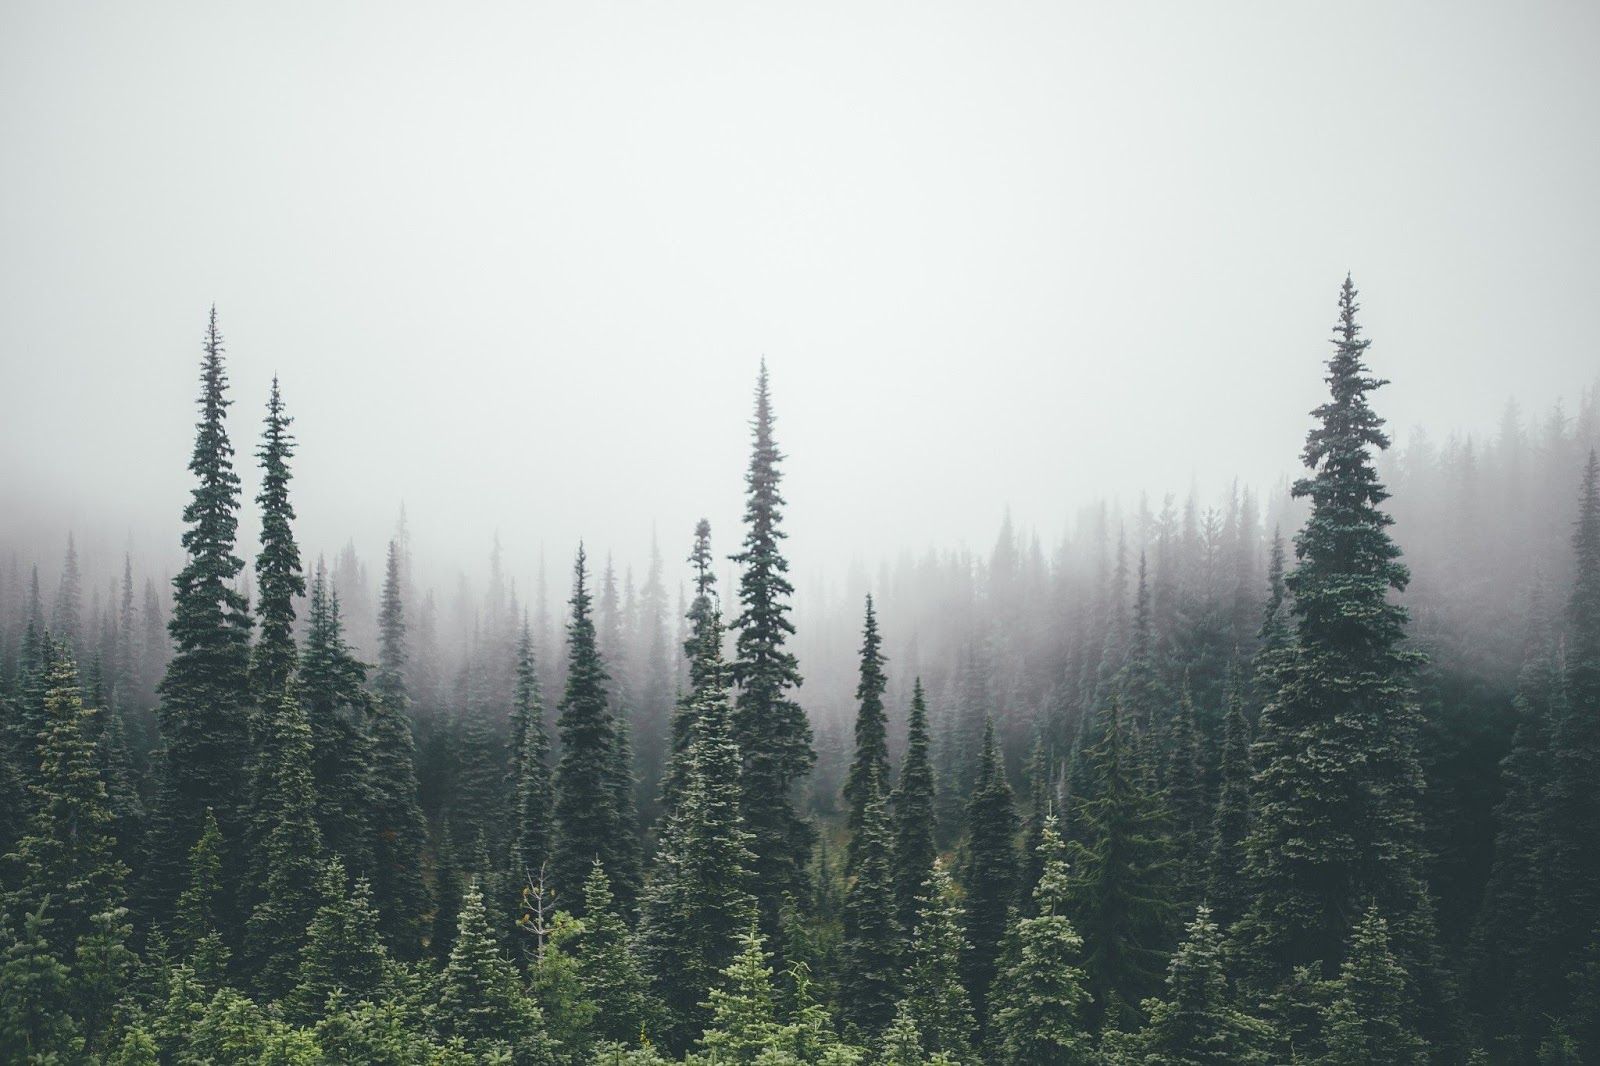
| Fig 1.4 Background image |
I chose the above image to be merged onto by subject.
 |
| Fig 1.5 photo edit |
I first removed the background of the image and also roughly erased parts of her head and arms. I did this because I wanted to alter the natural shape of the subject and make room for the trees.
 |
| Fig 1.6 Adding Trees |
I then imported the image of the forest and placed in on top of the head where I wanted the trees to be.
 |
| Fig 1.7 Screen image of Trees |
The next step was to apply blending modes to the images. I applied the Screen Blending to the Image of the trees so that it masked onto the subject image.
 |
| Fig 1.8 Adding trees |
I noticed that the image head some rough odd looking edges where the trees should be. In order to cover this up,I cutout the some of the trees in the trees layers to create tree silhouettes and placed multiple of these on top of the forest.
 |
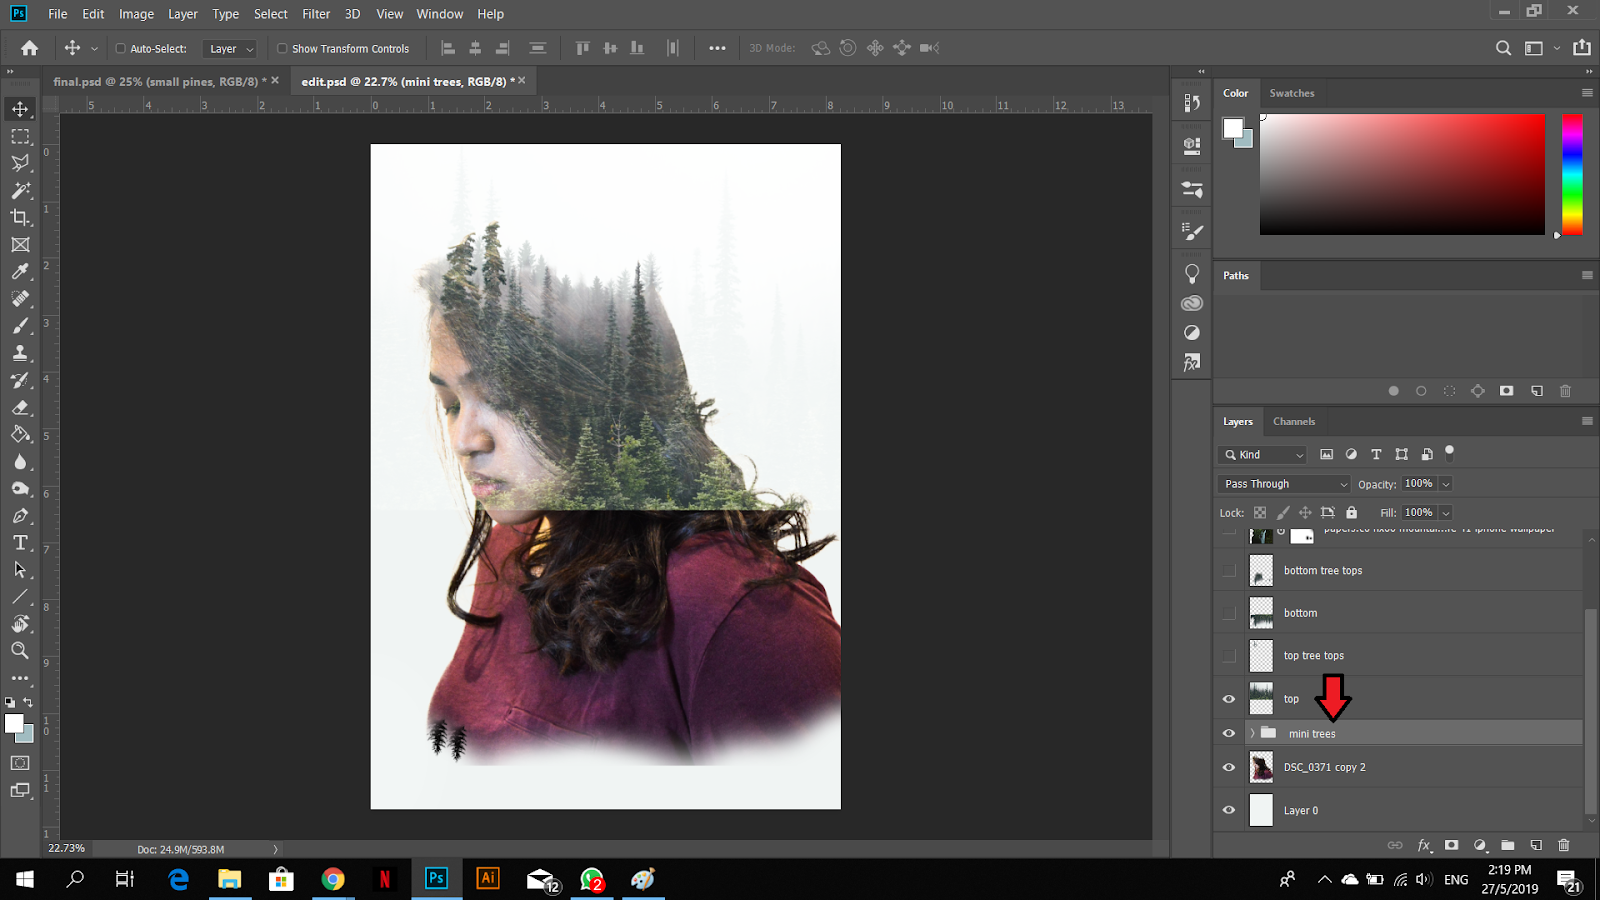
| Fig 1.10 Moving layer |
To merge the layers I simply moved the silhouette trees layer below the main trees layer.
 |
| Fig 1.11 Top of Tree Detail |
Because the Background around the head was white the top of the trees blending on the white was faded out. To solve this I duplicated the original tree layer and erased everything except the top of the tree.This helped show the continuation of the trees outside of the head.
 |
| Fig 1.12 Trees Flipped |
 |
| Fig 1.13 Adding Screen Blending to Image |
I then Flipped the Trees layer and added screen blending to the image to create the same effect of double exposure on the other half of the subject.
 |
| Fig 1.14 Trees Bottom Detail |
Because of the White Background I encountered the same Problem of the trees fading out. I duplicated the Trees layer again but this time instead of Erasing everything I left out some parts in the center of the image. This helped me get a darker tone in some areas.
 |
| Fig 1.15 Adding Waterfall |
I wanted to create more of an illusion so i decided to add a water on top of the upside down trees.
 |
| Fig 1.16 Masking Waterfall |
I placed the waterfall and the added Screen Blending mode. I also Masked out the corners of the waterfall image as well as the leaves and rocks around the waterfall in this layer.
 |
| Fig 1.17 Adjusting Brightness |
I felt three was too much light on the images So adjusted the Brightness and contrast of the artwork. I also erased the trees that were going over the subject face to add contrast to the artwork.
 |
| Fig 1.18 Adding detail to waterfall |
I felt the waterfall was a little dull. so I added a second layer of just the water on top of the original image. I also added some mist using the brush tools at the bottom of the waterfall.
 |
| Fig 1.19 Final Artwork |
I added some birds flying away from the top of her head to fill the emptiness on the top of the art board.
 |
| Fig 1.20 Final artwork |
Week 8
We were taught to how to use after effects to animate the surreal images we made. We were assigned to make a 5 second video animation of one or more elements in our artworks as final part of this project. For my animation I chose to make the trees sway in the wind.
 |
| Fig 1.21 Edit screen |
 |
| Fig 1.22 Effect control panel |
I used the CC slant effect on my trees and added a wiggle of .5 pixels every 15 milliseconds as shown in Fig 1.22. This gave me a smooth waving effect on my trees. I wanted to add animation to one more element in the artwork because the trees animation was too subtle. So I decided to animate the waterfall in the image.
 |
| Fig 1.23 Transform panel |
I made a duplicate of the water and using the transform tool stretched the image across the timeline to give effect of a water fall. I the added a Fade to beginning and end of the edit to create a smoother transition.
Final video


Comments
Post a Comment